


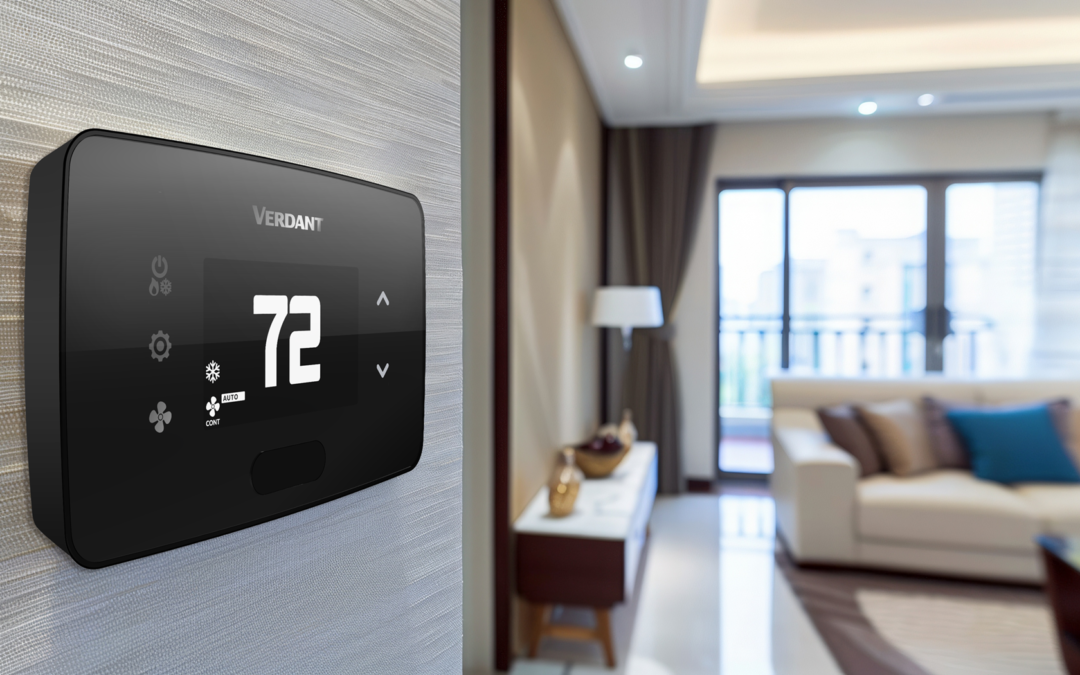
Welcome to our Verdant VX4 wired thermostat installation tutorial. In this guide, we’ll walk you through the steps to install your new smart thermostat and ensure everything is set up correctly.
If you’re looking for the VX4 wireless thermostat installation instructions, you can find the full guide here.
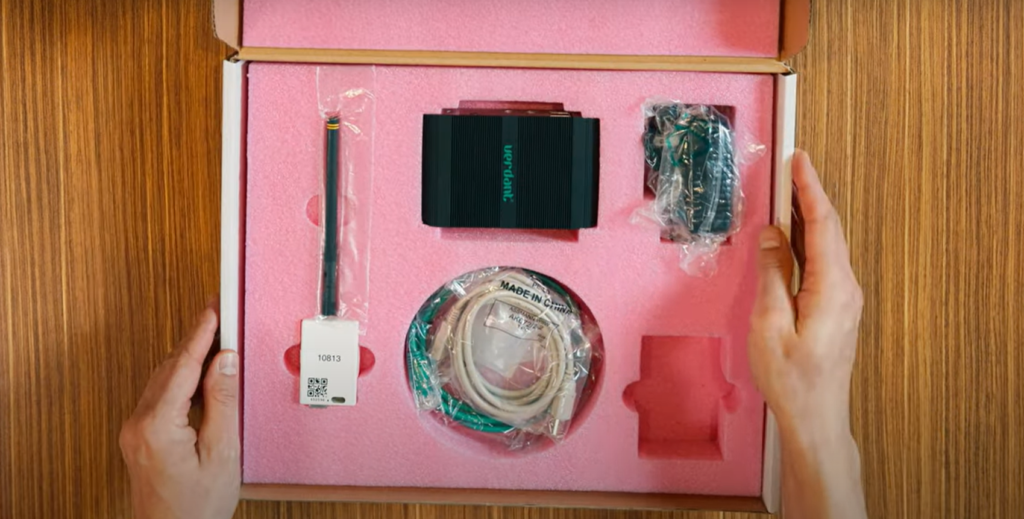
What’s in the Verdant VX4 Wired Box?
Before we begin the installation, let’s take a moment to identify and understand the components that come with your shipment:
- VX4 Thermostat – The core of your Verdant energy management system
- Online Connection Kit – Enables networking capabilities
- Optional Accessories – May include:
- Occupancy sensor
- Wall plate
- Door and window sensor
- VRF System Adapter – Provided depending on your setup
Step 1: Set Up the Gateway
Before installing the thermostat, we recommend setting up the gateway first. This is crucial for networked properties, as it allows all thermostats to connect to the internet and communicate with our cloud service. Installing the gateway first also lets us monitor installation progress and resolve any issues early on.
Components to Check
Make sure you have all parts from your online connection kit:
- RJ45 cable
- Verdant gateway
- USB cable
- Power supply
- Antenna
Step 2: Enable Networking Capabilities
Follow these steps to get your gateway and networking system up and running:
- Screw the antenna onto the wireless receiver
- Connect the wireless receiver to the Verdant gateway using the supplied USB cable
- Attach the wireless receiver to the wall using the double-sided adhesive tape
- Orient the antenna so it points upwards
- Connect the Verdant gateway to the LAN port using the RJ45 cable
- Plug the Verdant gateway into an electrical outlet using the power cord
Need Help Installing Your Verdant VX4 Wired Smart Thermostat?
Our technical support team is here to assist you throughout the process. If you’d like to confirm that the online connection kit is communicating properly with our cloud service, give us a call at:
Step 3: Configure the Online Connection Kit and Begin Thermostat Installation
Once your Verdant gateway is set up, it’s time to move on to the next steps.
Antenna Module Placement
Install the antenna module within 100 feet of the first few thermostats. Be sure to avoid placing it near large metal structures or surfaces, which may interfere with the signal.
Pro Tip: To prevent power-related issues, plug the Verdant gateway into a UPS (Uninterrupted Power Supply) unit.
Online Connection Kit Configuration
After plugging the online connection kit into your network switch, check to see if it comes online. If it doesn’t, you may need to contact your Internet Service Provider (ISP) to verify the following network configurations:
- Ensure the online connection kit is receiving an IP address from a DHCP server
- Ensure the MAC address is properly whitelisted if a splash page login is required for internet access
- You can find the MAC address on the white sticker on the bottom of the online connection kit
- If the kit is behind a firewall, make sure outbound ports 443, 10191–10291, and 22 are open
No inbound ports are needed unless specific options are requested.
With the online connection kit successfully installed and connected, you’re ready to move on to installing your Verdant VX4 wired thermostats in your rooms.
Verdant VX4 Wired Thermostat Wiring Overview
Let’s go over the wiring details of the Verdant VX4 wired smart thermostat.
For wired installations, there is no controller card to connect to—all wires are fixed on the back of the thermostat. Each wire has a default role, but they can be configured for different applications.
Here are the default functions of each wire:
- C (black): Common wire
- R: Provides 24 VAC power
- W: Controls heating
- Y (yellow): Controls cooling
- OB (orange): Reversing valve
- AUX 2 (brown): Relay used for occupancy output or other applications
- GL (purple): Fan control – low speed
- GH (green): Fan control – high speed
- AX1 (blue): Used in wet and dry contact applications (e.g., lighting, ventilation)
Step 4: VX4 Thermostat Installation and Configuration
With your wiring in place, let’s go over some key considerations for installing and setting up the Verdant VX4 wired smart thermostat.
Optimal Thermostat Placement
For accurate occupancy detection and efficient performance:
- Position the occupancy sensor toward the bed or the area where occupants spend most of their time.
- Avoid placing the thermostat near large metal structures or surfaces like metal air ducts, as these may block the wireless signal.
- Do not install it near:
- Windows or doors
- Supply or return vents
- Exterior walls
- Direct sunlight
These placements can interfere with proper temperature readings and occupancy detection.
Mounting the Thermostat
- Using a Wall Plate
Place the wall plate over the existing hole left by the old thermostat and mark two spots for drilling. - Direct Mounting
Hold the thermostat in your chosen spot and mark where the two mounting screws will go. - Install Anchors
Drill two 3/16″ holes and insert the wall anchors. - Secure the Thermostat
Use two screws to attach the thermostat securely—but do not overtighten the back plate. If the surface is uneven, always use the wall plate for stability.
Settings Configuration of Your VX4 Wired Thermostat
Once installed, it’s time to configure your VX4 thermostat:
- Mesh ID
- Use O1 if only one online connection kit is installed.
- If multiple kits are in use, choose the ID closest to the thermostat’s location.
- Use the up/down buttons to adjust digits.
- Press “Fan” to move between digits.
- Press “Settings” to save.
- Room Number
- Use the up/down buttons to select characters.
- Press “Fan” to advance digits.
- Press “Settings” to save.
- For multiple thermostats in the same room, add a letter (e.g., 0100 and 0100A).
- Equipment Code
- Adjust values with the up/down buttons.
- Use “Fan” to scroll through.
- Press “Settings” to proceed.
Check the manual or contact technical support to confirm the correct code.
- Energy Savings Profile (E0–E5)
- Adjust the level with the up/down buttons.
- Press “Settings” to continue.
- E0 = No energy savings (standard thermostat behavior)
- E1–E5 = Progressive energy savings (higher number = more savings)
- Time Setting
- Adjust digits using the up/down buttons.
- Press “Fan” to move between hours and minutes.
- Thermostat uses a 24-hour clock.
- Press “Settings” to finish.
If connected to the online connection kit, the time will update automatically.
- Scheduler
- Choose Y (yes) or N (no).
- Press “System Mode” to save.
The “System Mode” button also functions as the power button.
- Temperature Display
- To toggle between Fahrenheit and Celsius, tap the second button (“Settings”).
Resetting the Verdant VX4 Wired Thermostat
To perform a reset:
- Press and hold Power and Fan until the Mesh ID appears.
- Press “Settings” four times to reach the time screen.
- Press and hold Power and Fan again until RST appears.
- Press “Settings” to confirm.
The Mesh ID will return to O1, indicating a successful reset.
Connecting an Occupancy Sensor
- Remove the faceplate and insert two AAA batteries into the sensor.
- Press the internal button to make it discoverable.
- Follow the thermostat menu instructions to pair.
The sensor remains discoverable for 5 minutes.
To verify connection status, check the sensor status in the thermostat’s menu.
You’re all set! Your Verdant VX4 thermostat is now installed, configured, and ready to start saving energy in your property.
You can also follow along our video tutorial to learn how to install the Verdant VX4 wired thermostat:
This May Also Interest You: Everything to Know About the Verdant VX4 Smart Thermostats
Our Support Team is Here For You
If you need help at any point, our dedicated customer support team is here for you. From installation to troubleshooting, we’re just a call or click away.
📞 Call us at 1-877-318-1823
📧 Email: verdant.support@copeland.com
Ready to Take Control of Your HVAC Energy Management?
The Verdant VX4 thermostat is engineered to deliver smarter HVAC energy management across commercial properties, including hotels, multifamily buildings, senior living communities, and student housing. With intelligent features, intuitive setup, and powerful performance, it’s designed to help you reduce energy waste and increase operational efficiency—without compromising guest or resident comfort.
Book a demo today and discover the difference Verdant’s energy management system can make.